

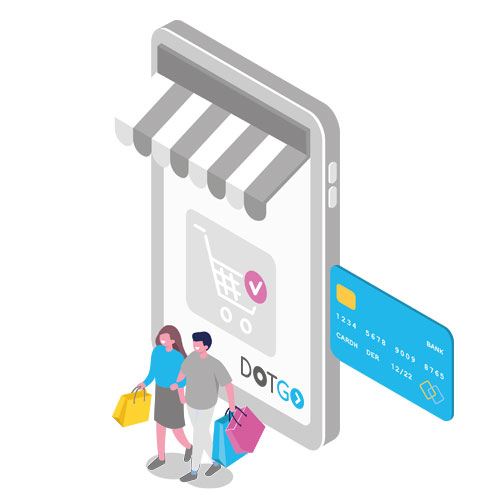
Congratulations! You’ve just been handed the keys to your brand new ecommerce website.
Customers can now start to engage with your business and purchase your products.
If you don’t own a brick-and-mortar store, this website represents the totality of your business. In other words, you have the entire business at your fingertips through this new ecommerce website. And, just like with a real life shop, you will naturally want to be familiar with every inch of it, and make sure all minor and major details are absolutely correct.
However, staying on top of everything in your ecommerce website is very difficult. You have to think about adding items, managing delivery costs, payments, and so on. There are some parts of our system that you may not even know about yet!
And that is why we have created this guide for you – to provide simple, concise explanations of what each part of the ecommerce editor does and how it can help you, all in one place.
Don't have time to read it all now? Want a copy saved on your computer? Download our Go.Guide PDF right here.
INDEX
1. Order Management
2. Item Management
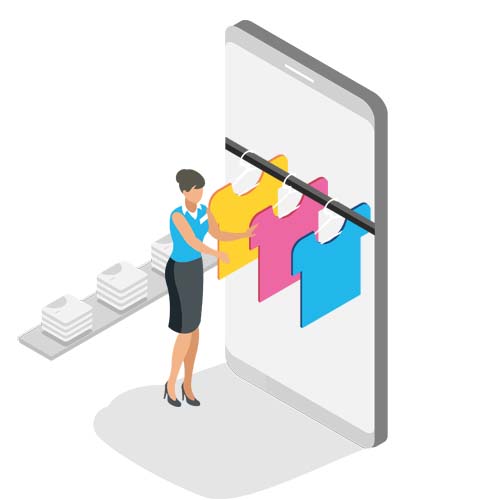
3. Uploading Item Images
4. Adding Additional Information to your Items
5. Bulk Editor
6. Groups
7. Categories
8. Managing Stock
9. Delivery Rules
10. Setting Discounts
11. Send Post-sales Emails
12. Setting up Stripe and PayPal
13. Digital Downloads
14. Connecting eBay
Order Management
You can view the orders customers make on your website in the Orders section. The section enables you to filter between (1) all orders, (2) successful orders, (3) pending orders, (4) abandoned orders, and (5) failed orders.
Each order has a unique order number, along with critical information such as payment provider used, date and time of order, value of order, and name of customer. Further information – delivery address, IP address, item ordered, etc. – is available by clicking on an order number.
The fulfilment tracking bands allow you to monitor the status of every order and stay completely on top of all traffic on your ecommerce website. Each order can be marked as (1) acknowledged, (2) processed, (3) dispatched, or (4) issue, depending on its current status.
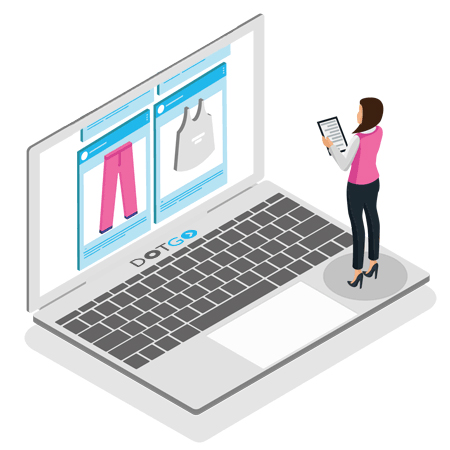
Item Management
Adding Items Manually
A new item can be added to your ecommerce website in seconds. The system initially gives you the choice to create an item from scratch or clone an existing one. Choosing the former will mean you need to give the new item a name and summary, otherwise it won’t save. The item editor section also encourages you to add a price for the new item, along with a longer description.
Bulk Spreadsheet Upload
Bulk spreadsheet upload is a tool that allows users to upload multiple items to their website at once, saving hours of time if you have a large shop. Users are given an Excel spreadsheet on which they can enter information about each item – name, summary, price, weight, stock code, etc. – in the preloaded columns and save the document ahead of uploading it directly to their website.
The spreadsheet has been configured to be read by the system, allowing you to simply enter item information and upload – a process that takes minutes. Users can add a maximum of 100 items with each bulk spreadsheet upload.
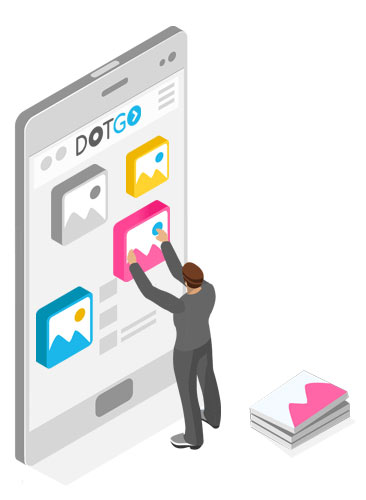
Uploading Item Images
Uploading Images for One Item
Users are encouraged to add a number of high-quality images for each item they upload to their website. You can change the way images are ordered and remove/add images at any time. The primary image, which sits on the top left of the image section inside the item editor, will be used to advertise the item when viewed on the website.
The quality of images selected are broken down into three categories – GREAT, OK, POOR – and marked out by different highlight colours. Images classed as GREAT are far more likely to attract sales.
Uploading Images for Multiple Items
Images across all items can be added, managed, deleted, changed and reordered in one convenient place. Offers users an easy way of ensuring all images for each item on their website are correctly placed and high quality. Search bar allows you to quickly locate a particular item and its images. This is an extremely useful time-saving tool for website owners with many items and associated images.
Adding Additional Information to your Items
Custom Fields
This tool, located in the item editor and also in the Extras section, enables users to add a feature common among all items, like country of origin, ahead of inserting a unique value – India, for example – for a particular item. Adding these specifications allows customers to compare items easily and makes your items more enticing.
Variants
Users would require the Variants tool when they want to display different versions of the same item on their website – such as a dress available in size 10, 12, 14, and so on. You can charge different prices and insert unique images for each variant of an item, making it easy for visitors to view the version they require. Each item can have up to three variant option types – size, colour, etc. – with as many as 20 different variations for each option type.
Tags
Tags are features of an item that are important to you, the website owner. A tag for an item could be something like “red dresses”, “best seller”, “luxury item”, or anything else that helps website owners manage their items and place them into logical Groups. They are not visible to customers – unless you choose to have them displayed in a group sidebar. Users can apply multiple tags to one item or one tag to all items, depending on their requirements.
Item Types
Item Types are obvious descriptions of what your items actually are, such as ‘Dresses’ or ‘Necklaces’. This tool is useful for users with large ecommerce websites as it helps them divide their website into logical sections, making item management easier. They are directly descriptive of an item, while tags are abstract pieces of information about an item.
Bulk Editor
Use the Bulk Editor to assign additional pieces of information to multiple items at once. Allows for fast and effective management of items; particularly useful for larger shops requiring constant changes to item characteristics. Website owners select items and then open the Bulk Editor, which allows them to:
1. Increase or decrease item price
2. Add/remove tag, item type, infotab, or group
3. Lock or unlock item
4. Pause or unpause item
5. Delete item
Groups
What is a Group?
A Group is a collection of items that all have something in common. You can create as many groups as you need, and one item can be assigned to multiple groups. They help you easily delineate between different parts of their website, enabling visitors to seamlessly locate the area of your website that interests them. An example group could be one containing discounted items, or maybe best sellers.
Creating Groups Manually
Website owners can use a dropdown in the group editor to search for items and add them to a new group. You must give the group a name, otherwise it won’t save. Adding a high-quality group image and a brief summary of what the group contains entices visitors to view your items.

Creating Groups Automatically
The Automated Rules section, located inside the group editor, lets users set specific criteria that automatically builds groups for them as they add items to their website. For example, a group with automated rules could have the following conditions: (1) items in the group must have a particular tag; 2) items in the group must be below £40. All items you add in the future that meet those two conditions will automatically join that group. Users can choose whether items must meet ALL conditions or just ONE of the conditions to enter the group.
This is an extremely effective and time-saving tool for owners of large websites who are frequently adding new items via Bulk Spreadsheet Upload. You can set criteria relating to item tags, names, price, stock level, stock code, or whether they have a discount attached to them. Automated Rules give you freedom to build a wide range of extremely specific groups that apply directly to your business.

Categories
What is a Category?
In the same way that a group is a collection of items that have something in common, a Category is a collection of groups with something in common. You cannot have a category unless you have already created a number of groups. Categories should be seen as a way of signposting a major pillar (or department) of your website. If you were a clothes shop, for example, you might have a category for Boys clothes and another for Girls clothes.
Imagine it in terms of a real-life shop. The groups are like the aisles, which contain certain items, and these aisles belong to a particular department. Categories play the same role as departments in a large supermarket.
- Watch our ‘Introduction to categories’ support video
- Read our ‘Introduction to categories’ support article
- Watch our support video on how to create a category and add it to your website
- Read our support article on how to create a category and add it to your website
When Would I Use a Category?
Not every ecommerce website needs to use categories. If you have a website with only 20 items, it is unlikely you will need to create categories. Low item count usually means you can create groups and use them to signpost the different areas of your website.
If, however, your website contains a high number of different groups, categories can become useful. As a clothes shop, for instance, you may have groups for women’s summer shoes, women’s comfort shoes, women’s shoe accessories, and so on. And when you have multiple groups that relate to a common theme, such as shoes, it makes sense to bunch them into a category, such as ‘Women’s Shoes’.
Users who place their groups into categories may then benefit from using the Category Collections tool, which allows you to bunch categories together and plug them into a main webpage. This enables visitors to see all the different departments of your website – Men’s Shoes, Women’s Shoes, Accessories, etc. – in one convenient, easily accessible place – like a virtual shop window.
Managing Stock
Site-Wide Stock Management
Users can choose whether they manage stock on their website in the Stock Management area. Activating stock management will mean the system adjusts stock levels of a particular item whenever a purchase is made, allowing you to keep fully on top of how many units of an item you have at all times.
You can also decide whether to show current stock levels to a customer when they view a certain item. If you have 0 items in stock, no number will be displayed, while having over 20 items in stock will cause the system to read 20+, rather than the exact number.
Moreover, users have the choice to receive an email notification when stock levels for a particular item reach zero.
Item Stock Management
Having decided on site-wide stock management settings, users can open the dropdown to locate an item whose stock they wish to manage. You can manually enter the stock level for each item in this area.
Every item you select has a stock change history – a table record of all changes to that item’s stock levels. Along with date of the change and order number, the table shows stock quantity before the stock change, stock quantity after the change, and the exact quantity of the change (which is normally -1).
Users can decide to allow sales on an item with zero stock. You would only do this if you had additional levels of stock that aren’t accounted for in the ecommerce system.
Using Stock Variants
If you have different variations of the same item, each variation will have its own stock quantity. You can use the stock management area, alongside the Variants section inside the item editor, to update stock levels for each variation of a particular item. Doing this gives customers a more targeted browsing experience. If you run a clothes shop, for instance, customers will appreciate being able to see the stock quantity for each size.
In the stock management section, users can choose either: (1) to give one total stock value for an item, which they’d do when an item did not have multiple variants with different stock levels, or (2) manage individual stock for each variant, which allows them to enter a unique value for each variant – as opposed to a total figure at the bottom.
- Watch our ‘Managing stock variants’ support video
- Read our ‘Managing stock variants’ support article
Additional Stock Rules
- If a customer attempts to buy multiple units of an item that exceeds its variant’s stock level, the system will block them from doing so – provided you have selected No on the “Allow Sales With Zero Stock” option
- However, if two or more customers try to buy a limited stock item at exactly the same time, the system could allow both of them to add the order to their basket – even if the aggregate order total between the two customers exceeds stock levels. In the payment stage, the system will make another check of stock levels prior to sending customers to post-checkout. The customer who is second to make payment will be returned to the basket.

Delivery Rules
If your website sells physical items, you will need to set delivery rules that apply particular shipping costs to orders made by customers.
Users do this by creating a delivery band, which is employed to set delivery rules for different countries and continents. If you only sell to customers in the UK, you will just need to create a “UK” delivery band.
Setting Standard Delivery Rules
There are three delivery options inside the delivery band editor: (1) a threshold for free delivery, (2) fixed standard price postage, (3) weight-based delivery. Generally, users will only need to use the first two options.
The first option, threshold for free delivery, allows you to set a minimal spend amount needed for an order to receive no delivery fee (£100, for example). And the second option, fixed standard price postage, is the delivery price you wish to apply to orders whose value is not high enough to trigger free delivery (£7.50, for example).
These options are ranked in order of priority. With every order, the system will firstly check whether it meets the threshold for free delivery. If it doesn’t, the system will apply the fee entered in the fixed standard price postage option. You must always make sure each option is switched on; otherwise no delivery charge will be imposed.
- Watch our ‘Introduction to delivery bands’ support video
- Read our ‘Introduction to delivery bands’ support article
Setting Weight-Based Delivery Rules
Users may need to set specific weight-based delivery rules if they have items with notably different weights. Doing this ensures website owners never lose money on unusually weighty orders and always apply the correct delivery charge.
To set weight-based delivery rules, the system has to know the weight of each item, which can be entered in the item editor. If you don’t know the exact weight for an item, you can enter a default weight in the delivery bands editor – this will be applied when an item does not have a designated weight.
In the weight bands, users enter a suitable delivery price to match a given weight range. You might want to charge £5 for orders between 1g to 500g, for example, and then £12.50 for orders between 500g and 1kg. The values entered here are entirely dictated by the nature of your items.
For orders of multiple items with different weights, users are given three different ways to combine delivery charges.
- Watch our ‘Weight-based delivery rules’ support video
- Read our ‘Weight-based delivery rules’ support article
Setting Alternative Delivery Rules
You can offer customers an alternative form of delivery at the checkout section. And the Alternatives area enables you to create a delivery alternative with a description and unique price. For example, you can offer a delivery option that guarantees next day courier delivery and costs £30. Users can offer up to two delivery alternatives.
You are also given the choice of whether alternative delivery charges are added to the original standard delivery cost, or if they replace the standard delivery cost. Using this option improves customer experience by giving them more options.
Rules About Multiple Delivery Bands
You may need to create another delivery band to account for orders from outside the UK, or from a certain country, like the USA.
Keep in mind that delivery bands are ranked in order of priority. When an order is made, the system initially checks to see if the order’s area code matches with the delivery band you created first (usually the UK one). If it doesn’t, it will check the delivery band you created next, and so on.
Should you receive an order from a country whose area code does not match with any delivery bands created, the delivery costs from the last (lowest) band will be imposed. This means it might be useful to create a ‘Rest of the World’ delivery band that applies a specific charge to all orders that come from outside your usual area of commerce. Doing this means you always receive the correct delivery fee from customers.
Setting Discounts
Creating Discount Vouchers
Discount vouchers are a popular way of drawing customers to your items. Users can create a unique voucher code and send it to loyal customers in a mailing list, or add it to a pop-up directly on their website.
You can choose how long the discount applies for, and whether the discount is based off percentage or price. If you enter a value for percentage and price, the discount that has greatest value of the two will be applied.
- Watch our ‘Creating a discount voucher code’ support video
- Read our ‘Creating a discount voucher code’ support article
- Watch our support video on creating a pop-up with a newly created discount voucher code
- Read our support article on creating a pop-up with a newly created discount voucher code
Bulk Discounts
Bulk discounts can be applied on an item-by-item basis, giving customers greater incentive to purchase more than one unit of an item. The system lets you use discount bands to set rules such as: 15% off when you buy two items, with purchases of three or more triggering 30% off.
These bulk discount bands are linked. ‘BAND 1’ usually applies to orders of one item and stays at zero, with the next band, ‘BAND 2’, dealing with orders of two or more units, and the last one, ‘BAND 3’ covering orders exceeding the unit amount stipulated in ‘BAND 2’.
Users will edit these bands in a way that suits their items. Please note that bulk percentage discount in ‘BAND 3’ should always be equal to or greater than the percentage in ‘BAND 2’ – otherwise the discount stipulated in ‘BAND 3’ won’t be applied.

Send post-sale Emails
Sending professional and informative post-sale confirmation emails is a crucial element of customer service. The ‘Emails’ section, located in the Settings area under Basket, defines how your website communicates with you and your customers following a purchase.
As the website owner, you can enter your email address in the A) Emails to you section and receive a mini summary of every purchase made, along with a link to a receipt.
The B) Emails to customers area serves as the most important section. Use this area to choose the email address that customers will receive their post-sale confirmation email from. This will be your professional address – something like info@mycompany.com – rather than your personal address.
You can also add an additional custom email address to offer a more specific email address to customers. If you add a custom email address – which could be something like customerservices@mycompany.com or support@mycompany.com – it will supersede the original email selected in the Email sent from dropdown.
Users can also choose to attach receipts and add some default text to be included in every post-sale email. Be sure that your post-sale emails are turned on – otherwise customers don’t receive any email.
Setting up Stripe and PayPal
Setting Up Payments With Stripe
Users can connect Stripe to their website, allowing visitors to pay with all major card types (Visa Credit/Debit, MasterCard Credit/Debit, American Express, Discover, Diners, JCB, UnionPay).
Follow each step in the below support video to activate Stripe. Users are just required to enter some basic information, at which point they are returned to the editor, and then enter the Stripe page again – this time to enter a verification code and log in. Your website will be connected to Stripe once you’ve logged in.
Note that Stripe takes 2.9% +40p – as a non-refundable transaction fee.

Setting up payments with PayPal
Give visitors a more seamless checkout experience by allowing them to pay for your items with PayPal. Before going through the steps of adding PayPal to your website, be sure you have a business account – rather than a personal one – set up already.
Adding PayPal as a payment gateway is a simple process of gathering information from your PayPal account – which you are taken to via the editor – and pasting it back into the boxes in the editor. Users just need to follow the steps in the support video/article below.
Note that Stripe takes 2.9% +20p – as a non-refundable transaction fee.
Digital Downloads
Uploading Files or Links
You can upload digital files or links to the editor ahead of attaching them to items – or selling them as digital items in their own right.
In the case of using files, ensure its information is correct and the file can be located easily, and remember that only the following file formats are accepted by the system:
- PDFs
- Microsoft Office documents (Word, Excel, Powerpoint)
- All images and videos
Other file formats will need to be included in a ZIP file prior to being uploaded to the system
Adding Digital Information to Items
Attach digital files or links – such as informative PDFs or a Zoom link – to items by entering the Digital Links and Downloads section inside the item editor.
You can immediately select a previously added digital file from a dropdown, or paste the relevant link into a box. Be sure that your link starts with https – otherwise it won’t save.
Users can choose when their chosen file/link will expire – either after a certain number of hours or on a particular date. The text area allows you to give important information to customers about the digital file/link in the post-sale email, such as what it offers and when it expires.
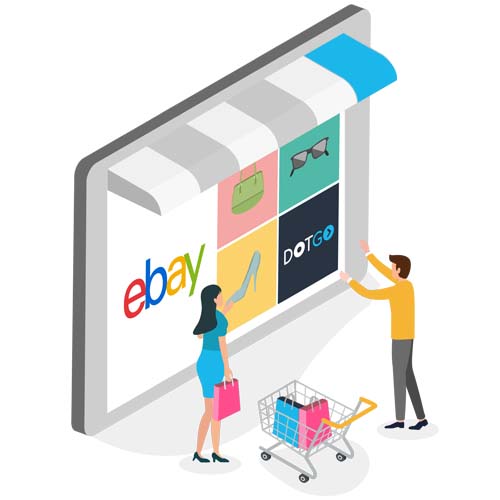
Connect to Your eBay Store
Users with eBay stores can import items into their new online shop in just a few clicks, saving website owners hours of time. The system forms a safe and secure link with your eBay store, reading its entire structure ahead of copying over item data, item codes, descriptions, variants and images. You can import up to 500 items at no extra cost. Please also note that your eBay store is untouched and retains its structure throughout the entire process.
Having followed three main steps – (1) logging in, (2) two-factor authentication, (3) consent to import – all you need to do is sit back and watch as your eBay items are reproduced in full on your new ecommerce website. Users will not have to repeat this process after doing it once; the system is now linked to your eBay store and can import new items with just one click.
Get your voice heard with DotGO marketing advice


Why do thousands of
business owners
trust DotGO?
It starts with just one click