|
|

Editor help movies
1 Introduction to Images
Images bring the internet to life. Having clear, descriptive pictures and images inside your site will directly contribute to its success.
Our editor makes it simple and fun to add images to your website.
You can upload images and store them in your own library. There is no need to worry about getting the sizing right or learning complicated commands with an expensive image editor - you can drag the images where you want and size them perfectly by just click and drag the edges to make the images perfect for your site.
There is no need to learn complicated programming commands or HTML script, just tell our system how you want your images displayed and it does all the hard work for you.
This guide is intended to provide additional information over and above that contained in the help video. It is assumed that you have watched the 3 minute video prior to reading this guide.
To watch the Image help movies type the following address into your browser http://www.reason8.com/upd8/flash/activedit/index.html
A screen will then appear and you should click Option 6 to watch the movies that discuss Images.
This guide is arranged into two sections
Section 1 deals with everything you need to know about the process of uploading images into your website.
Section 2 deals with the most important aspect of images, how to get them to look great in your website.
2 Section 1 - Uploading images
Before you can display a picture on your website you must first place that picture on the same computer (server) as your website. This process of moving a picture from your computer to the server is called uploading.
2.1 Before uploading
Before you upload images you must first locate the image you wish to upload. You should try and establish two things 1. the format of the image, and 2. the size of the image.
2.1.1 Format
Our system can take all three of the most popular formats for images .jpg .bmp and .gif. If your image is in any one of these three formats you can upload the image into your image library.
2.1.2 Size
Image size is measured in pixels. Images are displayed at 72 pixels per inch on the web, therefore a 200 pixel image corresponds to approx. 3 inches on the screen. The maximum size of image that the system can display is 400 pixels wide.
You should try and make sure that your image is .jpg, .gif or .bmp and that that it is less than 400pixels wide.
2.2 Uploading an image
This is covered in more detail in the help movie but has been provided here for consistency
- login to your site
- Click Step3 - webpages
- Open the text editor by clicking the name of one of your webpages in the table
- When the editor opens click the Insert Image icon
 on the editor. A small pop up window will appears as shown here.
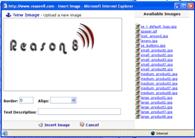
- Click the [New Image] link at the top of this window. The pop-up window changes to that shown here.
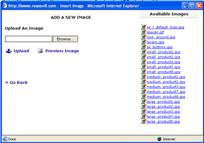
- Click the [Browse] button and search for the image you wish to upload on your computer
- After selecting the image click the [Upload] button. You will then be able to see the picture in the viewing pane on the left of the pop-up. The image name (prefixed by 'R8_')will also appear in the image library on the right of the pop-up. This indicates that the image has been uploaded successfully. Click [Insert Image] to insert the image.
Trouble shooting
If you find that nothing happens after you have clicked the [Upload] button it is highly likely that the image you have chosen is very big. Upload speeds are much slower than download speeds even for broadband connections). You may have to wait a few minutes if you picture is very large.
2.3 Maximising image quality
To maximise the quality of image displayed o your site we recommend uploading:
- An image that is less than 400 pixels wide
- A .jpg format image
If you upload an image that is larger than 400 pixels the system performs the following operations:
- It uploads the original image you provide
- It converts the image into a .jpg
- It checks the size of the image and if it finds that the image is greater than 400 pixels wide it then makes a smaller copy of the image where the width is 400 pixels.
- It then deletes the original image from the server.
However the technology used to reduce the size of the image is one chosen for efficiency not for quality. As a result shrinking the image causes a loss of quality. To avoid this loss of quality it is advisable to choose an image that is less than 400pixels wide.
If you have an image (perhaps a picture from a digital camera which is much larger) it is recommended to use a graphics program to reduce the image prior to uploading.
If you do not have a graphics program, you can download an excellent program FREE from the following address http://www.reason8.com/asquareimage.exe . We have been given permission by Trivista to distribute this software to our customers.
2.4 Images from digital cameras
If you wish to upload images direct from your digital camera onto your website there are a number of points that should be taken into consideration.
With the image quality from digital cameras increasing, the number of pixels and the image size is increasing too. (Even a low quality camera nowadays can produce images that are 2000 pixels wide)
This increased size means that upload time will increase as images as large as 2Mbytes are uploaded into the system. It also means that the image scaling algorithms used will cause a reduction in quality from the original.
If you are taking pictures on your digital camera for your website we recommend choosing a small file size setting.
2.5 Animated images
All images uploaded will be converted into .jpg format. If you upload an animated .gif image the animation will be lost and the first frame of the animation converted into a .jpg image.
3 Displaying images on your website
 Once you have uploaded the image onto your website you can then choose how to display the image.
3.1 Adding descriptive text
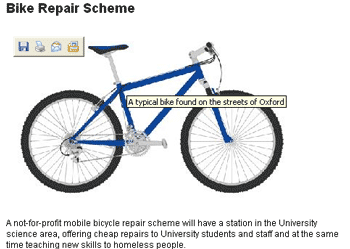
When you roll your mouse over an image you are often presented with text in a yellow box similar to that shown in the picture.
This is known as Alt text. It is powerful as it not only gives the user a lot more information about the image but the search engines too.
There are two ways to add Alt text to an image:
3.1.1 Adding Alt text when you load an image
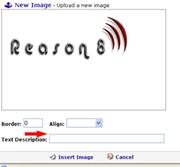
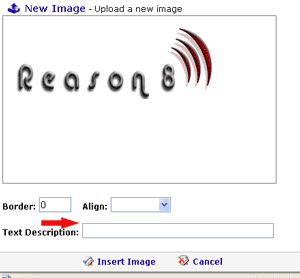
- Follow the first 6 steps of loading an image explained in the Uploading an image section.
- A window similar to that shown below will appear. You will be able to see the image in the viewing pane. Add text in the [Text Description] insert box as shown
- Click [Insert Image].
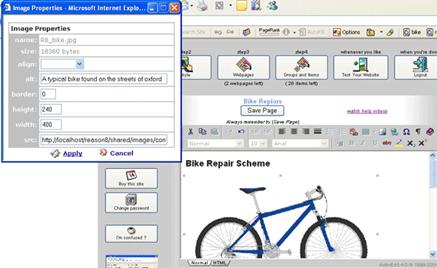
3.1.2 Adding Alt text to an existing image
- Open the editor window.
- Select the image by clicking it once. You should see small squares around the edges of the image showing that it has been selected.
- Click the Insert Image icon on the editor

- A pop-up window will appear like that shown. Enter the Alt text in the [alt] text insert field.
![]()
3.2 Resizing your images
![]()
 If the image you have uploaded is bigger than you would like it is easy to change the shape of the size of the image.
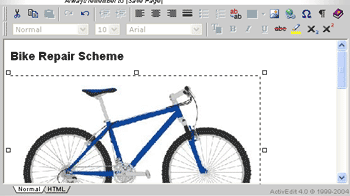
Just click the image once so that the squares appear around the edges. Then click any of the squares and drag to resize the image as you wish.
Alternatively you can open the Insert image window by clicking on the icon ![]() and manually choosing an image height and width.
and manually choosing an image height and width.
3.3 Positioning your images on your webpage
Once you have uploaded your image, added descriptive text and made it the correct size you can then decide how to position it.
TIP It is often better to add the text before you add the image. This way you can decide the best location of the image. The amount of text will help you decide how to position the image.
3.4 Positioning your image by dragging it with your mouse
- Open the editor window
- Insert the image you require
- Click once over the image and do not release the mouse button
- With the mouse button still depressed carefully move the image to a new location.
3.5 Placing your image above or below your text
By default the system will assume that you want your image inline with the text. This means that text will NOT flow around your image.
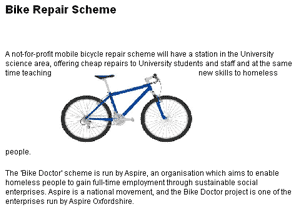
This is ideal if you want to place your image above or below your text or interrupt the flow of your text with your image as shown.

With this setting, your image will appear wherever you drag it but text will not flow around the outside of the image
3.6 Changing the image alignment settings:
You can change the default settings of how the image and the surrounding text behaves.
To change the settings
- Click on the image so that the little squares appear around the edge
- Click the [Insert Image] icon

- In the pop-up box that appears select from the pick-list as shown
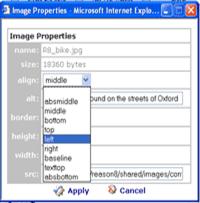
The following table shows the result of each of these settings.
Setting |
Result |
Absmiddle - Text does not wrap around the outsides of the image. But the line of text on which the image is placed is aligned to the middle of the image |
|
Middle - Similar to ' Absmiddle' |
|
Bottom - the surrounding line of text is placed at the bottom of the image. |
|
Top - the surrounding line of text is placed at the top of the image. |
|
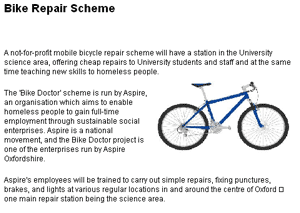
Left - The image is placed on the left and all the text smoothly completely wraps around the image, giving a professional look and allowing a lot more information to be displayed. |
|
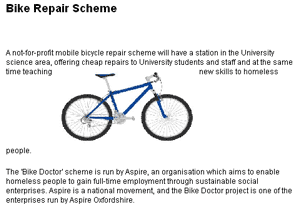
Right - The image is placed on the right and all the text smoothly completely wraps around the image, giving a professional look and allowing a lot more information to be displayed. |
|
Baseline - same as 'bottom' |
|
Texttop - same as 'Top' |
|
Absbottom - same as 'Bottom' |
|


| User guide | Link guide | Image guide | Buy guide |